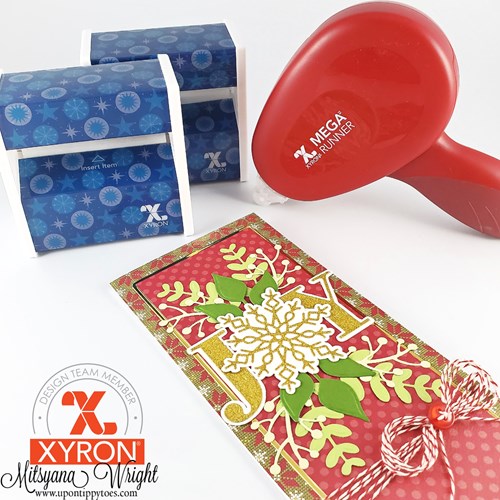
Christmas in July DIY Card
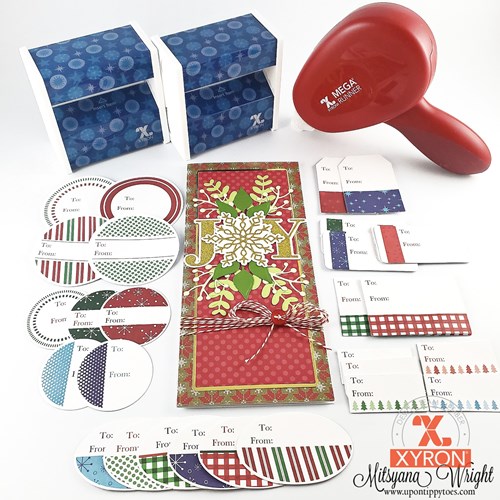
Christmas in July wouldn’t be complete without a holiday project, and we have the perfect one for you! Crafter and blogger Mitsyana Wright of Up On Tippy Toes fame shares how to make her DIY “Christmas In July” card. It has all the trimmings, glitter, sparkle, and sentimental value. Break out your Xyron Holiday Giftwrap Bundle and follow along with her step-by-step instructions below!
Supplies Used:
Xyron® Holiday Gift Wrap Bundle
Maker's Movement® - Winter Foliage Die Set
Maker's Movement® - Foliage Die Set
Sizzix® Big Shot
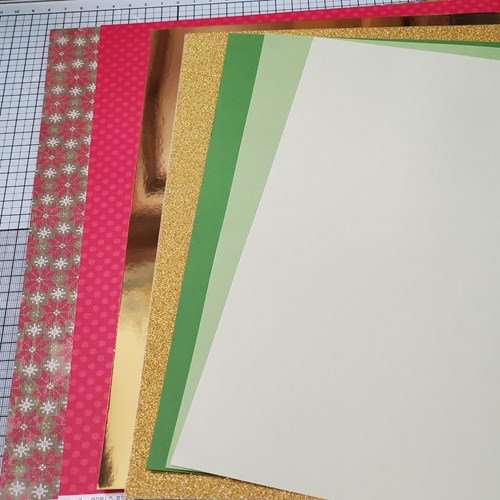
Authentique™ - Christmas Greetings Collection
Recollections™- Forest Cardstock
Accent® 120 lb White Cardstock
Crafter's Companion- Luxury Cardstock Gold
Red & White Baker's Twine
Red Button
Paper Trimmer
Pencil
Scissor
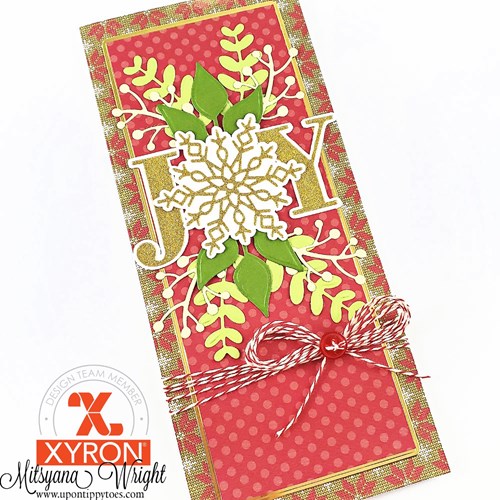
1. Gather your supplies.
2. Trim white cardstock to measure 8" × 9". Fold the paper in half to create a 4" × 9" slimline card base.
3. Trim Poinsettia paper to measure 4" × 9", gold foil paper to 3-1/2" × 8-1/2", and polka dot paper to 3-1/8" × 8-1/16".
4. Layer and adhere the poinsettia papers onto the slimline card base using a Xyron® Mega Runner. Then adhere the polka dot paper onto the gold foiled cardstock. Keep these two separate for now.
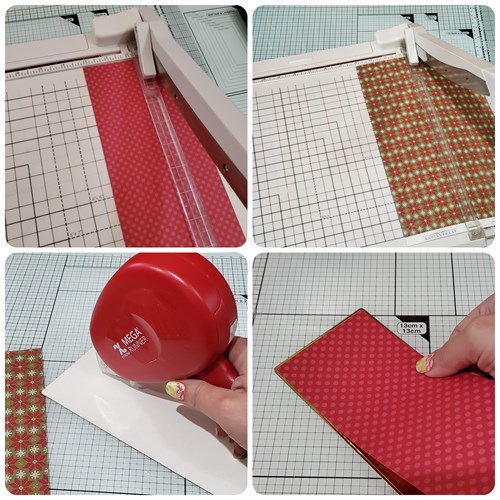
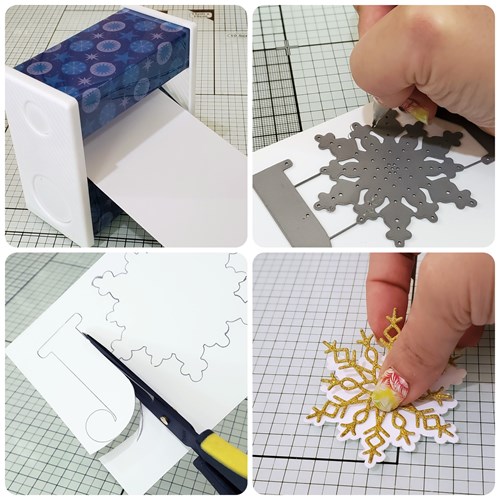
5. Trim the Gold Glitter cardstock down to 3" × 5" and run it through the Xyron 3" Sticker Maker.
6. Die cut the JOY die set out of the adhesive-backed gold glitter cardstock using a Big Shot machine.
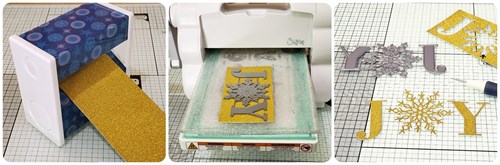
7. Run a 3" × 5" piece of white cardstock through the Xyron 3" Sticker Maker.
8. Use the JOY word dies and a pencil to trace around the die onto the white cardstock to create a shadow.
9. Cut out the shadow layer using scissors.
10. Adhere gold glitter die-cuts onto their white cardstock shadow layer.
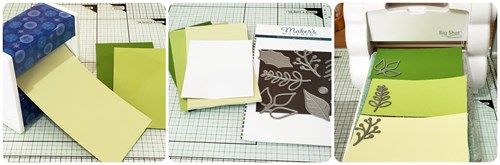
11. Trim down multiple Greens and white cardstock into 3 inch wide strips and run them through the Sticker Maker.
12. Die-cut foliage from the green and white cardstock papers.
13. Adhere the J & Y of the JOY die cuts onto the card front.
14. Arrange half your foliage die-cuts above the J & Y. Repeat below the letters as well.
15. Adhere the snowflake in the center to cover the stems of the foliage pieces.
16. Wrap Twine around the bottom portion of the card front and add a button topped bow.
17.Finally, adhere card front onto card base using the Xyron Mega Runner.
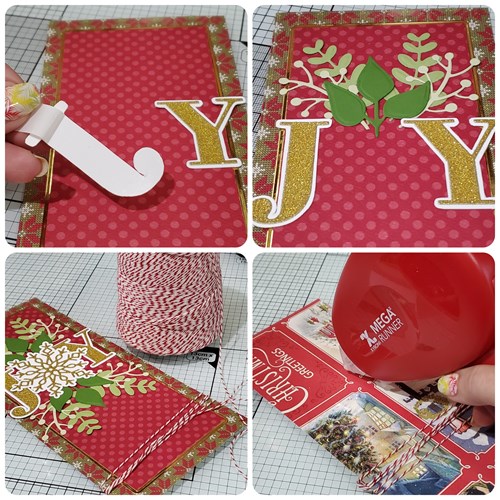
And here is the finished card!
I used the Xyron Mega Runner and 3" Sticker from the Holiday Bundle...